0%

1
2
3
4
5
6
7
8
9
10
11
12
13
14
15
16
17
18
19
20
21
22
23
24
25
26
27
const express = require('express')
const bodyParser = require('body-parser')

const app = express()
//支持不同的请求体
app.use(bodyParser.urlencoded({ extended: false })) //application/x-www-form-urlencoded
//app.use(bodyParser.json()) //如果需要发送JSON数据 application/json

//获取参数 query http://localhost:3333/?a=1
app.get('/', (req, res) => {
res.send('this is homepage')
console.log(req.query) //{a:1}
})

//获取参数 params http://localhost:3000/profile/123/user/weibin
app.get('/profile/:id/user/:name', function (req, res) {
res.send(`your id is ${req.params.id},yourname is ${req.params.name}`) //your id is 123,yourname is weibin
})

//使用bodyParser 获取post的参数,参数挂到了req.body上面 使用postman测试
app.post('/', (req, res) => {
console.dir(req.body)
})

app.listen(4000)


显示效果

css

1
2
3
4
5
6
7
8
9
10
11
12
13
14
15
16
17
18
19
20
21
22
23
24
body{background-color: blue}
.box{
width: 500px;
height: 500px;
position: relative;
border:1px solid #ccc;
background-image: linear-gradient(-45deg, rgba(255, 255, 255, 0.02) 25%, transparent 25%, transparent 50%, rgba(255, 255, 255, 0.02) 50%, rgba(255, 255, 255, 0.02) 75%, transparent 75%, transparent);
background-size: 20px 20px;
}

.box::before {
content: '';
display: block;
position: absolute;
left: 0;
top: 0;
z-index: -1;
width: 100%;
height: 100%;
background-color: #05305C;
background: linear-gradient(135deg, transparent 15px, #173B6B 0, #173B6B 16px, transparent 15px, #05305C 0) top left, linear-gradient(-135deg, transparent 15px, #173B6B 0, #173B6B 16px, #05305C 0) top right, linear-gradient(-45deg, transparent 15px, #173B6B 0, #173B6B 16px, #05305C 0) bottom right, linear-gradient(45deg, transparent 15px, #173B6B 0, #173B6B 16px, #05305C 0) bottom left;
background-size: 51% 51%;
background-repeat: no-repeat;
}

同源策略

协议,域名 和 端口 http://www.baidu.com:80,三者必须都一样,否则跨域,
非同源操作不了 cookie,ajax,dom

HTTP/HTTPS协议

HTTP 是基于 TCP/IP 协议的应用层协议。默认使用80端口。
HTTPS协议:简单来说,可以理解为安全版的HTTP协议,基于TCP/IP协议和SSL/TLS协议之上的应用层协议。默认端口443。

HTTP协议以明文方式发送内容,不提供任何方式的数据加密,如果攻击者截取了Web浏览器和网站服务器之间的传输报文,就可以直接读懂其中的信息,因此HTTP协议不适合传输一些敏感信息,比如密码等。

为了解决HTTP协议的这一缺陷,需要使用另一种协议:安全套接字层超文本传输协议HTTPS。为了数据传输的安全,HTTPS在HTTP的基础上加入了SSL协议,SSL依靠证书来验证服务器的身份,并为浏览器和服务器之间的通信加密。缺点:1,申请证书需要钱,2,耗费性能,3.也不是绝对安全

http协议特点:
1.无状态:http协议没法保存客户机信息,也就没法区分每次请求的不同之处。关于http无状态阻碍了交互式应用程序的实现。比如记录用户浏览哪些网页、判断用户是否拥有权限访问等。于是,两种用于保持HTTP状态的技术就应运而生了,一个是Cookie,而另一个则是Session。
2,无连接:是限制每次连接只处理一个请求。服务器处理完客户的请求,并收到客户的应答后,即断开连接。采用这种方式可以节省传输时间。

HTTP协议工作流程

3次握手
客户端和服务器之间建立一条连接
连接建立后,客户端向服务器发起一个请求(request)
服务器收到一个请求后,给客户端一个响应(应答,response)
客户端收到响应后做进一步处理

OPTIONS请求是什么

OPTIONS是一个预请求,跨域的情况下,如果有以下情况发生,则会先发送OPTIONS,服务端允许才会
发送真正的请求,否则不会发送
1、请求方法不是GET/HEAD/POST
2、POST请求的Content-Type并非application/x-www-form-urlencoded, multipart/form-data, 或text/plain
3、请求设置了自定义的header字段

301 302区别

301和302都在response头里设置,301是永久重定向,302是临时重定向
301表示这个请求第一次请求服务器后,以后再发送就不询问服务器了,客户端直接跳转到新地址
302每次还是要访问服务器看有没有新的地址跳转

CSP 安全策略

缓解某些类型的攻击,包括跨站脚本 (XSS) 和数据注入等攻击。
后端response头设置X-Content-Security-Policy
也可在META标签内设置 <meta http-equiv="Content-Security-Policy" content="default-src 'self'; img-src https://*; child-src 'none';script-src userscripts.example.com">
一个网站管理者想要所有内容均来自站点的同一个源 (不包括其子域名)所有脚本必须从特定主机服务器获取可信的代码.

前端后端如何跨域通信

1.JSONP
2.websocket (不限制同源策略)
3.cros (支持同源,非同源通信)
4.postMessage (h5)

如何创建AJAX

ajax请求过程:创建XMLHttpRequest(兼容性)、连接服务器、发送请求、服务器做出响应、接收响应数据

GET,POST区别

1.GET后退按钮/刷新无害,POST数据会被重新提交(浏览器应该告知用户数据会被重新提交)
2.GET能被缓存,POST不能缓存 。
3.GET历史参数保留在浏览器历史中。POST参数不会保存在浏览器历史中
4.GET对数据长度有限制,当发送数据时,GET 方法向 URL 添加数据;URL 的长度是受限制的(URL 的最大长度是 2048 个字符)。POST无限制。
5.GET的数据在 URL 中对所有人都是可见的。POST的数据不会显示在 URL 中

jsonp

1.html标签的src属性没有同源限制(支持跨域),创建script标签,src属性指向外部链接,并有一个和后端约定好的函数执行代码,服务端不再返回JSON格式的数据,而是返回一段调用某个函数的js代码,在src中进行了调用,这样实现了跨域

缺点:没有关于 JSONP 调用的错误处理。如果动态脚本插入有效,就执行调用;如果无效,就静默失败。失败是没有任何提示的

安装

MongoDB官网下选择 try it free进行下载。双击安装

启动

1) 前提准备

  1. mongo.exe 所在目录 加入到系统环境变量当中
  2. 数据存放:在MongoDB安装目录下面新建文件夹 mkdir data\db
  3. 日志存放:在MongoDB安装目录下面新建文件夹 mkdir log,并新建文件 mongod.log

2) 双击 安装目录下的 mongod.exe 直接启动服务

3) 命令行启动服务

1. 命令行直接运行

mongod.exe --dbpath="C:\Program Files\MongoDB\data\db"
后面的文件路径既是 之前创建好的 data\db

2. 通过配置文件启动服务
  • c盘根目录下创建文件 mongod.cfg。在其中配置好要输出的 data 与 log
    1
    2
    3
    4
    5
    systemLog:
    destination: file
    path: C:\Program Files\MongoDB\log\mongod.log
    storage:
    dbPath: C:\Program Files\MongoDB\data\db
  • 命令行通过配置文件启动服务 mongod --config c:\mongod.cfg
3. 通过安装服务来启动
  • 命令行直接输入命令来安装
    mongod.exe --dbpath="C:\Program Files\MongoDB\data\db" --logpath="C:\Program Files\MongoDB\log\mongod.log" --install
  • 通过上面创建好的配置文件来安装
    mongod --config c:\mongod.cfg --install
  • 启动MongoDB服务
    net start MongoDB
  • 关闭MongoDB服务
    net stop MongoDB

进入mongodb

命令行直接敲入 mongo 即可

注意事项

  1. Windows 10 的 C盘下面有些权限的问题。可将MongoDB文件夹的各项权限提高。
  2. 安装服务不能成功的,以管理员身份运行安装下即可

参考资料

  1. JasonCeng_的博客
  2. Windows 平台安装MongoDB
  3. lsc183

1.基础原理详见上一篇 react-redux 理解
2.分为两个页面 auth.js是登录页 Dashbord是主页 ,默认不输入登录页地址的话直接到dashbord.js做验证,没有登录的话去auth.js

index.js入口页面 引用

1
2
3
4
5
6
7
8
9
10
import {createStore,applyMiddleware} from 'redux';
//npm install redux-thunk -save
import thunk from 'redux-thunk' //applyMiddleware中间件,redux-thunk处理异步获取
import combineReducers from './reducer' //涉及到合并reducer 不合并的话可以不用
import {Provider} from 'react-redux'
//路由
import {BrowserRouter,Route,Redirect,Switch} from 'react-router-dom'
//分为登录页和主页 做权限校验
import Auth from './Auth.js'
import Dashbord from './Dashbord'

index.js 页面逻辑 默认去dashbord页面

1
2
3
4
5
6
7
8
9
10
11
12
13
14
15
16
17
18
19
20
21
22
//如果不处理异步 直接const store = createStore(counter)就可以了
//这里用了combineReducer 合并了auth.redux.js index.redux.js里两个reducer
const store = createStore(combineReducers,applyMiddleware(thunk))

ReactDOM.render(

//使用react-redux 方便了很多 Provider只在入口页面写一次 负责传入store 也不需要subscribe订阅了

(<Provider store={store}>
<BrowserRouter>
<div>
<Switch>
{/*只命中匹配上的第一个route*/}
<Route exact path='/Auth' component={Auth}></Route>
<Route path='/Dashbord' component={Dashbord}></Route>
<Redirect to='/Dashbord'></Redirect>
</Switch>
</div>
</BrowserRouter>
</Provider>),
document.getElementById('root')
)

Auth.redux.js

1
2
3
4
5
6
7
8
9
10
11
12
13
14
15
16
17
18
19
20
21
22
23
24
25
26
27
28
29
30
31
32
33
34
35
36
37
38
39
40
41
42
43
44
45
46
47
48
49
50
51
52
53
54
55
import axios from 'axios'

const LOGIN = 'LOGIN'
const LOGOUT = 'LOGOUT'
const USERDATA = 'USERDATA'
const init = {
// isAuth:false,
user:'李云龙',
age:20
}

/**
* 这是一个 reducer,形式为 (state, action) => state 的纯函数。
* 描述了 action 如何把 state 转变成下一个 state。**/
export function auth(state = init ,action){
console.log('auth.redux.js里的 state : ' + JSON.stringify(state))
console.log('auth.redux.js里的 action : ' + JSON.stringify(action))
switch(action.type){
case LOGIN:
return {...state,isAuth:true}
case LOGOUT:
return {...state,isAuth:false}
case USERDATA:
return {...state,user:action.payload.user,age:action.payload.age}
default :
return state
}
}

//惟一改变 state 的方法就是触发 action,action 是一个用于描述已发生事件的普通对象
//// 改变内部 state 惟一方法是 dispatch 一个 action。
//action
export function login(){
return {type:LOGIN}
}

export function logout(){
return {type:LOGOUT}
}

//可传入一个载荷 将在reducer的action中体现
export function userData(data)
{
return {type:USERDATA,payload:data}
}
//建立一个异步的action 因为数据传输是异步的 需要手动dispatch
export function getUserData(){
return dispatch=>{
axios.get('/data').then(res=>{
if(res.status === 200){
dispatch(userData(res.data))
}
})
}
}

Dashbord.js 进入这个页面 要做用户是否登录的判断,如果没登录跳转到auth.js页面

1.通过connect state.auth和 logout方法挂载到当前组件的this.props下了
2.默认this.props.isAuth肯定是没有定义的 this.props.isAuth ? app : redirectToLogin

1
2
3
4
5
6
7
8
9
10
11
12
13
14
15
16
17
18
19
20
21
22
23
24
25
26
27
28
29
30
31
32
33
34
35
36
37
38
39
40
41
42
43
44
45
46
import React, { Component } from 'react';
//路由
import {Route,Link,Switch,Redirect} from 'react-router-dom'
import App from './App';
import {connect} from 'react-redux'
import {logout} from './Auth.redux'

@connect(
state=>state.auth,
{logout}
)

class Dashbord extends Component{

render(){
console.log(this.props)

const redirectToLogin = <Redirect to='/Auth'></Redirect>
const match = this.props.match;
const app = (
<div>
{this.props.isAuth?<button onClick={this.props.logout}>注销</button> : null}
<ul>
<li>
<Link to={`${match.url}/`}>一营</Link>
</li>
<li>
<Link to={`${match.url}/erying`}>二营</Link>
</li>
<li>
<Link to={`${match.url}/qibinglian`}>骑兵连</Link>
</li>
</ul>
<Switch>
<Route path='/Dashbord/' exact component={App}></Route>
{/*<Route path='/Dashbord/erying' component={Erying}></Route>
<Route path='/Dashbord/qibinglian' component={Qibinglian}></Route>*/}
</Switch>
</div>
)


return this.props.isAuth ? app : redirectToLogin
}
}
export default Dashbord

Auth.js

1
2
3
4
5
6
7
8
9
10
11
12
13
14
15
16
17
18
19
20
21
22
23
24
25
26
27
28
29
30
31
32
33
34
35
36
37
38
39
40
41
42
43
44
45
46
47
48
49
50
51
52
53
54
import React, { Component } from 'react';
import {connect} from 'react-redux'
// import {connect} from 'react-redux'
// import {addGun,addGunAnsyc,removeGun} from './index.redux'
import {login,getUserData} from './Auth.redux.js'
import {Redirect} from 'react-router-dom'


//通过connect state属性 和 方法 都挂载到props
//这里挂了state.auth 所以下面可以通过this.props.isAuth 取得用户是否登录
@connect(
state => state.auth,
{login,getUserData}
)

class Auth extends Component{
constructor(props){
super(props)
this.state = {
data:{}
}
}
componentWillMount(){

this.props.getUserData()
console.log(this.props)
// axios.get('/data').then(res=>{
// if(res.status == 200){
// this.setState({
// data:res.data
// })
// }

// console.log('state.data ',JSON.stringify(this.state.data.user,null,2))
// })
}
render(){
console.log('auth页面的props' + JSON.stringify(this.props))

return (
<div>
{/*<h2>我的名字是{this.state.data.user}</h2>*/}
<h2>用户名:{this.props.user},年龄:{this.props.age}</h2>

{this.props.isAuth ? <Redirect to='/Dashbord' /> : <h2>你没有权限,需要登录才能看</h2>}

<button onClick={this.props.login}>登录</button>
</div>

)
}
}
export default Auth

1
2
3
4
5
6
7
8
9
10
11
12
13
14
15
16
17
18
19
20
21
22
23
24
25
26
27
28
29
30
31
//全选
$("#checkall").click(function() {
var checked = $(this).is(":checked");
console.log(checked)
if(!checked){
console.log('没选中')
$("input[name='checkName']").each(function() {
$(this).prop("checked", false);
});
}
else{
console.log('选中')
$("input[name='checkName']").each(function() {
$(this).prop("checked", true);
});
}

});

var chks = $("input[name='checkName']")
chks.click(function(){
for(var i =0 ; i < chks.length ; i++){
if(!chks[i].checked){
console.log('有一个没选')
$("#checkall").prop("checked", false);
return ;
}
}
console.log('都选了 ')
$("#checkall").prop("checked",true);
});

用react-redux的好处 想必较 直接使用redux
他不用处理dispatch 通过connect挂载到所需组件的props上 方法直接有了dispatch
通过provider给所有组件传入store 不用store.subscribe(render) 去做订阅了

总体说明

1.应用中所有的 state 都以一个对象树的形式储存在一个单一的 store 中。

2.惟一改变 state 的方法就是触发 action,action 是一个用于描述已发生事件的普通对象
改变内部 state 惟一方法是 dispatch 一个 action。

3.为了描述 action 如何改变 state 树,你需要编写 reducers。

4.reducer,形式为 (state, action) => state 的纯函数。描述了 action 如何把 state 转变成下一个 state。

5.Action 本质上是 JavaScript 普通对象。我们约定,action 内必须使用一个字符串类型的 type 字段来表示将要执行的动作。多数情况下,type 会被定义成字符串常量。

6.同步不用手动dispatch react-redux帮我们做了,
我目前认为的是在组件内部挂载到connect下。同步方法就给你加了dispatch了见下边的this.props.addGun

异步需要手动的dispatch 不管同步异步 都要通过dispatch修改action 只有action能告诉reducer 如何改变state

applyMiddleware(thunk) 这个中间件的作用就是为了处理异步的action(比如需要向后台发送数据)

7。withRouter可以包装任何自定义组件,将react-router 的 history,location,match 三个对象传入 因为 只有Router 的component组件能够自动带有三个属性

index.js入口页面

1
2
3
4
5
6
import {createStore,applyMiddleware} from 'redux';
//npm install redux-thunk -save
import thunk from 'redux-thunk' //applyMiddleware中间件,redux-thunk处理异步获取
import combineReducers from './reducer' //负责合并reducer
import {Provider} from 'react-redux' //provider 负责把STORE传入到组件中

applyMiddleware,redux-thunk都是处理异步的

#combineReducers reducer.js

1
2
3
4
5
6
7
8
//合并所有reducer 并返回

import {combineReducers} from 'redux'
import {counter} from './index.redux'
import {auth} from './Auth.redux'

export default combineReducers({counter,auth})

#两个reducer index.redux.js
1.加减机关枪

1
2
3
4
5
6
7
8
9
10
11
12
13
14
15
16
17
18
19
20
21
22
23
24
25
26
27
28
29
30
31
32
33
34
35
const ADD_GUN = '加机关枪'
const REMOVE_GUN = '减机关枪'

// 这个东西就是reducer
export function counter(state = 0 , action){
switch(action.type){
case ADD_GUN:
return state + 1
case REMOVE_GUN:
return state - 1
default:
return 10
}
}


//action 同步的action 这里不用dispatch了 页面调用的时候

export function addGun(){
return {type:ADD_GUN}
}

export function removeGun(){
return {type:REMOVE_GUN}
}

//这就是异步了 需要手动触发dispatch
export function addGunAnsyc(){
return dispatch=>{
setTimeout(() => {
dispatch(addGun())
}, 2000)
}
}

2.Auth.redux.js

1
2
3
4
5
6
7
8
9
10
11
12
13
14
15
16
17
18
19
20
21
22
23
24
const LOGIN = 'LOGIN'
const LOGOUT = 'LOGOUT'

export function auth(state = {isAuth:false,user:'李云龙'},action){
switch(action.type){
case LOGIN:
return {...state,isAuth:true}
case LOGOUT:
return {...state,isAuth:false}
default :
return state
}
}


//action
export function login(){
return {type:LOGIN}
}

export function logout(){
return {type:LOGOUT}
}

index.js 页面创建 store

1
2
3
4
//如果不处理异步 直接const store = createStore(counter)就可以了
//这里用了combineReducer 合并了auth.redux.js index.redux.js里两个reducer
const store = createStore(combineReducers,applyMiddleware(thunk))

#通过provider将STORE传入根组件 下面所有的组件就都有了store

1
2
3
4
5
6
7
8
9
10
11
12
13
14
15
16
17
18
ReactDOM.render(

//使用react-redux 方便了很多 Provider只在入口页面写一次 负责传入store 也不需要subscribe订阅了

(<Provider store={store}>
<BrowserRouter>
<div>
<Switch>
{/*只命中匹配上的第一个route*/}
<Route exact path='/Auth' component={Auth}></Route>
<Route path='/Dashbord' component={Dashbord}></Route>
<Redirect to='/Dashbord'></Redirect>
</Switch>
</div>
</BrowserRouter>
</Provider>),
document.getElementById('root')
)

#组件调取store 通过connect 将本组件使用到的store里的属性 和 方法挂载到本组件

1
2
3
4
5
6
7
8
9
10
11
12
13
14
15
16
17
18
19
20
21
import {connect} from 'react-redux'
@connect(
state =>({num:state.counter}),
{addGun,removeGun,addGunAnsyc}
)


render() {

return (
<div>
<Button type="primary" size="small" onClick={this.props.addGun}>申请武器</Button>
<Button type="primary" size="small" onClick={this.props.removeGun}>上交武器</Button>
<Button type="primary" size="small" onClick={this.props.addGunAnsyc}>拖两天再给</Button>

<h1>现在有机枪{this.props.num}把</h1>
</div>
)
}


this.props.num 因为通过connect 把state.counter放到this.props.num上了

同理其他方法 也挂载到props里了

1
2
3
4
5
6
7
8
9
10
11
12
13
14
15
16
17
18
19
20
21
22
23
24
25
26
27
28
29
30
31
32
33
34
35
36
37
38
39
40
41
42
43
44
45
<!doctype html>
<html lang="en">
<head>
<meta charset="UTF-8">
<meta name="viewport"
content="width=device-width, user-scalable=no, initial-scale=1.0, maximum-scale=1.0, minimum-scale=1.0">
<meta http-equiv="X-UA-Compatible" content="ie=edge">
<title>Document</title>
<style>
body{
background:#6EC3FF;
}
.hl-box{
position: absolute;
top: 400px;
left: 300px;
width: 300px;
box-shadow: 0 0 1px 2000px rgba(0,0,0,.5), 0 2px 15px rgba(0,0,0,.4);
height: 200px;
border-radius: 4px;
transition: all 1s;
}
</style>
</head>
<body>
<div class="hl-box"></div>
<h1>爱上大还是打开就卡萨爱上大还是打开就卡萨爱上大还是打开就卡萨丁和</h1>
<h1>爱上大还是打开爱上大还是打开就卡萨爱上大还是打开就卡萨就卡萨丁和</h1>
<h1>爱上大还是打爱上大还是打开就卡萨爱上大还是打开就卡萨开就卡萨丁和</h1>

<script>
// window.onload=function(){
// setTimeout(function(){
// document.getElementsByClassName('hl-box')[0].style.left='500px';
// },1000)
// }
</script>
</body>
</html>

显示效果

需求:实现一个九宫格布局,每个格子都有个删除按钮,点击按钮删除当前的宫格

1
2
3
4
5
6
7
8
9
10
11
12
13
14
15
16
17
18
19
20
21
22
23
24
25
26
27
28
29
30
31
32
33
34
35
36
37
38
39
40
41
42
43
44
45
46
47
48
49
50
51
52
53
54
55
56
57
58
59
60
61
62
63
<html>
<head>
<title></title>
</head>

<style type="text/css">
*{padding: 0; margin: 0}
ul{display: flex; width: 300px;flex-wrap: wrap; list-style-type: none; margin:50px;}
li{
flex:0 0 100px;
height: 100px;
line-height: 100px;
text-align: center;
border: 4px solid #ccc;
box-sizing: border-box;
margin-top: -4px;
margin-right: -4px;
}
li:hover{
border-color: red;
z-index: 2
}
</style>
<body>
<ul id="list">
<li>1 <span class="del">X</span></li>
<li>2 <span class="del">X</span></li>
<li>3 <span class="del">X</span></li>
<li>4 <span class="del">X</span></li>
<li>5 <span class="del">X</span></li>
<li>6 <span class="del">X</span></li>
<li>7 <span class="del">X</span></li>
<li>8 <span class="del">X</span></li>
<li>9 <span class="del">X</span></li>
</ul>
<script type="text/javascript">
class List{
constructor(dom){
this.ulObj = document.getElementById(dom);
this.ulObj.addEventListener('click',(e)=>{

if(e.target.className === 'del') {
this.removeItem(e.target)
}
})
}
removeItem(target){
let parent = target.parentNode
this.ulObj.removeChild(parent)

}
}

window.addEventListener('DOMContentLoaded',function(){
new List('list')
})


</script>
</body>
</html>

关键样式:
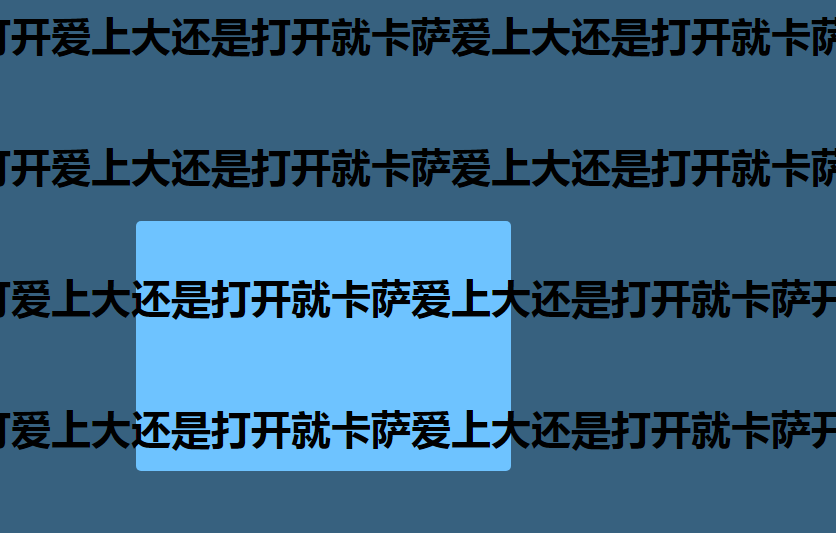
① 父元素(这里是div)设置和高度一致的 line-height (这里是200px)— 由后面的vertical-align定义看,这是为了设置div的基线
② 子元素 (这里是span) 设置合适的line-height,并设置display:inline-block、vertical-align: middle; — inline水平的元素无法设置line-height。所以这里要设置inline-block。

1
2
3
4
5
6
7
8
9
10
11
12
<style>  
*{padding: 0;margin:0;font-size: 12px;}
div{float: left;width: 200px;height:200px;margin: 10px;border:1px solid blue; line-height: 200px;}
span{display: inline-block;vertical-align: middle;line-height: 22px;}
</style>

<div>
<span>测试文字测试文字</span>
</div>
<div>
<span>测试文字 <br/> 测试文字<br/> 测试文字<br/> 测试文字<br/> 测试文字<br/> 测试文字</span>
</div>